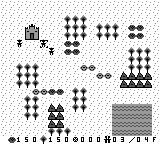
A tile-based real-time strategy game for the original Game Boy, in the spirit of Age of Empires II. Gather resources, build a base, raise an army, and raze the enemy's Town Centre before they raze yours.
This guide is for playing the game: what the buttons do, what everything costs, and how to survive long enough to flatten the enemy base.
If you're new, skim The aim of the game, Controls, and A solid opening build order first. The deeper tables are here when you want the exact numbers.
The aim of the game
It's you against one computer opponent on a 32×32 tile map.
- You win by destroying the enemy Town Centre.
- You lose if the AI destroys your Town Centre.
To get there, run an economy, grow your population, build military buildings, train an army, and march it across the map to tear down the enemy base. The win/lose screen returns you to the title so you can play again.
The game runs in slow real-time: time always advances, but unit, build and training timers are gentle so you have room to drive the cursor between decisions.
Controls
The whole game is driven by a single tile cursor and the four buttons. Most buttons do double duty depending on what (if anything) you have selected.
| Input | Action |
|---|---|
| D-pad | Move the tile cursor. Push at a screen edge and the map scrolls (the world is bigger than the screen). |
| A | Context action. On your own unit → select it. With a unit selected: on a tile → move there; on a resource → gather it; on an enemy unit/building → attack it. On one of your production buildings → open its train menu. With select-all-military armed → order the whole army. With a production building selected (menu closed) → set its rally point. |
| B | Cancel / deselect / back out of a menu. With nothing selected → jump to your next idle villager (press again to cycle through them). |
| Start | With a villager selected → open the Build menu. With a production building selected → open its Train menu. With nothing selected → arm select-all-military (then press again, or B, to disarm). |
| Select | In a match → Pause / unpause (a PAUSED banner shows; the game freezes until you press Select again). On the title screen → toggle Sound On/Off (see Sound below). |
Website keyboard controls
When playing on the website, the emulator maps your keyboard to the Game Boy buttons like this:
| Game Boy input | Keyboard |
|---|---|
| D-pad | Arrow keys |
| A | X |
| B | Z |
| Start | Enter |
| Select | Shift |
Once the emulator has loaded, the page keeps the arrow keys from scrolling the browser window so they only move the in-game cursor.
Selecting and ordering units
- Move the cursor over one of your units and press A to select it (a bracket frames it).
- Press A on a destination tile to send it there. It routes around obstacles (water, mountains, resources, buildings) automatically. If the destination is completely walled off (no route exists at all), the unit walks as far as it can and presses up against the wall rather than refusing to move — so an army ordered at a sealed-off base advances to the barrier instead of standing still.
- Press A on a resource tile (forest / berries / gold) to send a villager to gather it.
- Press A on an enemy unit or building to attack it.
- Press B to deselect.
Only one unit at a time can be selected for individual orders — but you can command your whole army at once with select-all-military (below).
Quality-of-life controls
These shortcuts cut down on cursor trips — handy because you give orders slower than the AI does, so the game hands you tools to keep up:
- Pause (Select). Press Select during a match to freeze everything; a
PAUSEDbanner shows on the bottom bar while the battlefield stays on screen. Press Select again to resume. Good for catching your breath and reading the map mid-battle. - Select-all-military (Start, nothing selected). Press Start with no unit or building selected to arm army command, then press A: on an enemy → the whole army attacks it; on open ground → the whole army attack-moves there (walks over, engaging any enemy it meets on the way, then carries on). Villagers are left out of it, so your economy keeps working. Press B or Start again to disarm. This is the fast way to move your army as one.
- Jump to idle villager (B, nothing selected). Press B with nothing selected to snap the cursor onto your next idle villager; press again to cycle through any others. If income suddenly stalls, tap B to find the slackers and put them back to work — then A to select and order one.
- Rally points. See Training units below — set where freshly trained units gather so they don't pile up on your buildings.
The cursor tells you what A will do. As you move it around, the cursor changes shape to match the action waiting under it, so you can read the order before you press A:
| Cursor shows | Means A will… |
|---|---|
| Corner brackets | Select the friendly unit/building under it |
| Diamond | Move the selected unit to this tile |
| Axe | Gather this resource (forest / berries / gold) |
| Sword | Attack the enemy unit/building under it |
| Hammer | Place the building you're positioning |
| Hollow box | Nothing here to act on |
Building (villagers only)
With a villager selected, press Start to open the Build menu. The buildables appear together on a menu row at the bottom of the screen (part of the HUD, not floating over the map), each with its cost shown below. In the Feudal age you can build House, Barracks, Blacksmith; advancing to the Castle age (see Ages & upgrades) adds the Archery Range, Stables and Tower (a defensive turret — see Defending: Towers & garrison). Press Left/Right to move the highlight and A to pick one and enter placement:
- The D-pad drags a ghost footprint across the map.
- It reads OK over valid, empty grass and blocked/hatched over occupied, blocked, or off-map cells.
- A commits (spends the Wood); B cancels.
Buildings are built by a villager, not summoned. Committing drops a foundation, and the villager you used walks over and constructs it over a short build time — a small hammer icon sits over it while it's going up. A foundation is not functional yet: it can't train units, and a House doesn't raise your population cap, until it's finished. A few things follow from this:
- You can't realistically build in the enemy's base — your villager has to walk there and stand exposed for the whole build, so forward building is a real commitment, not a free drop.
- Keep the builder alive: if it's killed mid-build the foundation just pauses. Send another villager onto it (press A on the foundation with a villager selected) to resume.
- Put more than one villager on a foundation to build it faster.
Repairing & demolishing
- Repair. With a villager selected, press A on any of your own damaged buildings to send the villager to repair it — its HP climbs back up over time for a little Wood, and a wrench icon shows while the work is underway. Handy for patching up your Town Centre or a battered military building between attacks.
- Demolish. Select one of your buildings (press A on it) and its HUD menu shows a Demolish icon alongside any train option; pick it to tear the building down (a demolished House gives its +3 population back). You can't demolish your Town Centre. Useful for clearing a misplaced building or reclaiming the space.
Training units
Press A on one of your production buildings to open its train menu directly:
| Building | Trains |
|---|---|
| Town Centre | Villager |
| Barracks | Spearman |
| Archery Range | Archer (Castle age) |
| Stables | Cavalry (Castle age) |
Press A to start training (if you can afford it and you're under the population cap); B closes the menu. While a building is training, an hourglass icon shows over it; the unit appears beside the building when its timer finishes. (Each building's menu also carries a Demolish option — see Repairing & demolishing above. The Town Centre and Blacksmith menus also offer research options — see Ages & upgrades below.)
Queue several at once. Pressing A on a producer that's already training the same unit stacks another order behind it (up to 5 waiting), charging each as you queue it — so you can tap A a few times to line up a batch instead of babysitting the building. The HUD shows what you're training as an [icon][count] tray on the status bar. Pressing B on the menu cancels and refunds one queued order (it only closes the menu once the queue is empty; Start always closes). If you hit the population cap, the queue holds and resumes the moment a House (or a death) frees a slot.
Rally points. By default a trained unit just stands beside its building. To send new units somewhere automatically, select the production building, press B to close its train menu (the building stays selected), then press A on any walkable tile to set that building's rally point. From then on, every unit it trains walks straight to that tile — handy for gathering an army at a forward muster point, or routing new villagers toward a fresh resource patch.
Defending: Towers & garrison
Two ways to turtle once you reach the Castle age:
- Defensive Tower. Build a Tower (a Castle-age building) anywhere you want to cover — it auto-fires at the nearest enemy unit in range, no orders needed, so it guards a chokepoint, a resource patch, or your base while your army is away. It's tough (lots of HP) but, like any building, it has to be built by a villager first. It only shoots enemies — your own units pass safely.
- Garrison your Town Centre. Under a raid, pull villagers to safety inside the Town Centre: press A on your TC to open its menu and choose Garrison — the nearest idle villager walks in and shelters (it leaves the field but still counts toward your population). A Town Centre with anyone garrisoned fires arrows at nearby enemies, just like a Tower, turning it into a defensive strongpoint. Choose Ungarrison from the same menu to send the sheltered villagers back out (they reappear beside the TC). Classic "garrison under attack, then get back to work" play.
Seeing what things cost
Whenever a Build or Train menu is open, the HUD grows two rows upward: an options row showing every choice's icon at once, and a cost row below it showing the highlighted option's price. Each cost number sits directly under its matching resource in the stockpile bar, so you can read what you have (top) against what it costs (below) at a glance. Only the resources an option actually needs are shown. Any option you can't afford (or that's blocked by the population cap, or a building already busy training) has its icon dimmed to grey — and because all the build options show together, you can see at a glance exactly which buildings are within reach before committing.
Reading the HUD
A status bar runs along the bottom of the screen showing, left to right:
Food Wood Gold Population / CapThe economy
Resources are gathered by villagers from a tile next to the resource (they never stand on it). A villager walks to the resource, mines until it's carrying a full load (carry capacity 10), hauls it back to a drop-off (your Town Centre — it can deposit at any edge of the footprint), then repeats.
| Resource | Source tile | Speed | Mainly buys |
|---|---|---|---|
| Food | Berries | Fastest | Villagers, Spearmen, Cavalry, population |
| Wood | Forest | Medium | Houses and all military buildings, Archers |
| Gold | Gold ore | Slowest | Archers, Cavalry |
Distance is the real rate limiter — the further a resource is from your drop-off, the slower the effective income. Keep gatherers near home and expand outward.
Resources run out
Resource tiles are finite. Each holds a number of loads (one villager carry = one load):
- Forest → 5 loads, then becomes a walkable stump (eventually grass).
- Berries → 7 loads, then grass.
- Gold ore → 8 loads, then grass/rock (rich enough to support the age advance plus Archers/Cavalry without adding extra resource clutter to the map).
A 2×2 starter Berry cluster therefore holds roughly 28 loads (about 280 Food); same-size Forest clusters hold 20 loads (about 200 Wood). Enough to open with, but not forever. When a villager's tile runs dry it automatically re-targets the nearest live resource of the same type nearby; if none is close, it goes idle (check your villagers if income suddenly stalls). So the map gradually opens up over a match and you're pushed to expand — you can't camp one forest forever.
Population
| Value | |
|---|---|
| Starting population cap | 4 (granted by the Town Centre) |
| Per House | +3 |
| Maximum cap | 16 |
Every unit — villager or soldier — costs 1 population. When you hit the cap, training is blocked until you build another House (or a unit dies). Build houses early so your training never stalls.
Units
You start each match with 3 villagers. All four unit types share a counter triangle so no single unit dominates:
Spearman beats Cavalry → Cavalry beats Archer → Archer beats Spearman (the Archer out-ranges the Spearman).
| Unit | Role | HP | Attack | Range | Armor | Speed | Trained at | Cost | Train time |
|---|---|---|---|---|---|---|---|---|---|
| Villager | Gather & build | 25 | 3 | 1 | 0 | Medium | Town Centre | 50 Food | 12 s |
| Spearman | Melee infantry | 45 | 6 | 1 | 1 | Medium | Barracks | 60 Food | 14 s |
| Archer | Ranged | 30 | 5 | 4 | 0 | Medium | Archery Range | 40 Wood + 30 Gold | 16 s |
| Cavalry | Fast melee | 70 | 8 | 1 | 1 | Fast | Stables | 70 Food + 40 Gold | 20 s |
Counter bonuses (extra damage):
- Spearman: +5 vs Cavalry — brace spears to break a charge.
- Cavalry: +4 vs Archer — fast enough to close on archers and ride them down.
- Archer (range 4) punishes Spearmen who can only hit at range 1 — but is fragile (30 HP, no armor) once anything reaches it.
Combat model: damage per hit = max(1, attacker Attack + counter bonus − defender Armor). Armor never makes a unit fully immune (minimum 1 damage). A unit attacks once its target is within range and its cooldown has elapsed; an idle unit that gets hit retaliates automatically. Hit sparks and HP bars show the fight on screen.
Soldiers fight by default. An idle military unit (Spearman, Archer,
Cavalry) automatically attacks the nearest enemy unit or building that comes
within a short radius — so a garrison left at your base defends itself without
you babysitting it (and the enemy's does the same). **Villagers never pick
fights (they keep gathering). Any order you give overrides** auto-engagement:
a unit you've told to move or gather ignores nearby enemies until that order
finishes, so you always stay in control — move a soldier away and it won't turn
back to brawl.
Friend or foe: your units and the enemy's are drawn through different
shading so you can tell them apart at a glance, and each civilization's
military units have a distinct silhouette.
Buildings
You start with one Town Centre (pre-placed). Everything else you build with a villager. Buildings are tough — razing a base is a real commitment, not a drive-by.
| Building | Footprint | Wood cost | HP | Age | Purpose |
|---|---|---|---|---|---|
| Town Centre | 2×2 | — (pre-placed) | 400 | — | Drop-off for resources; trains Villagers; researches the Castle age; garrisons villagers & fires arrows when manned; its destruction wins/loses the game |
| House | 1×1 | 30 | 150 | Feudal | +3 population cap |
| Barracks | 2×1 | 160 | 250 | Feudal | Trains Spearmen |
| Blacksmith | 1×1 | 120 | 200 | Feudal | Researches permanent attack / armor upgrades (no units) |
| Archery Range | 1×2 | 175 | 200 | Castle | Trains Archers |
| Stables | 2×2 | 190 | 300 | Castle | Trains Cavalry |
| Tower | 1×1 | 120 | 350 | Castle | Auto-fires at the nearest enemy unit in range (no units) |
You can only build on plain, unit-free grass. The Archery Range, Stables and Tower appear in the Build menu only once you've reached the Castle age.
No turn-one rush. You start with 150 Wood — enough for an early House
(30 Wood) but not any military building (the cheapest, the Barracks, is 160).
You must gather Wood before you can field an army, and so must the AI.
Ages & upgrades
Both sides start in the Feudal age and can advance once to the Castle age — the strategic spine of a match, in the spirit of Age of Empires II.
Advancing to the Castle age
Select your Town Centre (press A on it) and its menu offers, alongside the Villager, an Advance to Castle Age option (a castle-keep icon). It costs 300 Food + 100 Gold and takes a good while to research (the Town Centre can't train Villagers while it's researching), so it's a real mid-game investment. When it completes:
- The elite roster unlocks. You can now build the Archery Range and Stables, and so field Archers and Cavalry — they're Castle-age units, unavailable in Feudal.
- The higher Blacksmith upgrades unlock (tiers 2–3, below).
- A one-time army boost: every one of your units gets +1 attack, applied instantly and permanently.
Aging is a commitment — it ties up your Town Centre and a chunk of resources — but without it you're stuck with Villagers and Spearmen while a Castle-age opponent fields cavalry and archers. The AI ages up too, so don't fall behind.
Blacksmith upgrades
The Blacksmith (120 Wood, a Feudal building) researches permanent stat upgrades for all your units, present and future. Select it to open its research menu — it offers two lines:
| Line | Effect per tier | Cost (tier 1 / 2 / 3) |
|---|---|---|
| Attack | +1 attack to every unit | 60 / 120 / 180 Food (+ 0 / 40 / 80 Gold) |
| Armor | +1 armor to every unit | 60 / 120 / 180 Wood (+ 0 / 40 / 80 Gold) |
Each line has three tiers (a cumulative +1, +2, +3). Tier 1 is available in Feudal; tiers 2 and 3 require the Castle age. A tier can't be researched twice, and like training, research runs on the building's timer (an hourglass shows while it works). These bonuses feed straight into the combat formula — a Spearman with +2 attack researched hits for 8 instead of 6 — and they stack with the Castle age's +1 attack and your civ bonuses. A Blacksmith economy is how you make a small army punch above its numbers.
Civilizations
There are three civilizations. Each is the same units and buildings with different numbers — one economic strength, one military strength, and one deliberate weakness — so each is strong in a different phase and none is strictly best.
| Civ | Identity | Economy bonus | Military bonus | Trade-off |
|---|---|---|---|---|
| Picts | Turtle / economy | Gather Wood +20% | Buildings +25% HP (hard to raze) | Cavalry costs +25% Gold |
| Lombards | Infantry / pressure | Barracks costs −25% Wood | Spearmen tougher & train faster; +1 starting Spearman | Archers −1 range (fire at 3, not 4) |
| Alans | Cavalry / mobility | Villagers move faster & gather Food +15% | Cavalry +20% HP (60 instead of 50) & faster | Buildings −15% HP (fragile base) |
Bonuses are small percentages — they tilt a match, not decide it. All of the bonuses above are live.
Choosing a civ: after the title screen a civ-select screen lists the
three civilizations. Use Up/Down to move the marker and press A to pick
yours; the AI is automatically assigned a civ that
counters your choice (Picts → Alans → Lombards → Picts), so picking a
different civ — yours and the opponent's — visibly changes the match.
Choosing a map
After you pick your civilization, a map-select screen lets you choose the battlefield. Use Up/Down to move the marker and press A to start the match on the highlighted map:
| Option | What you get |
|---|---|
| Classic | The fixed, hand-designed map — the same symmetric layout every time, good for learning the game or a repeatable fight. |
| Arena | A different, but still fixed, generated map — plays the same on every pick, so you can master it too. |
| Random | A fresh map every match, generated on the spot. |
Every map — fixed or random — is perfectly fair: it's built with 180° rotational symmetry, so whatever terrain, forests, gold and obstacles your side has, the enemy has an identical mirror image. Random maps are also checked to be fully connected (both bases and every resource patch are always reachable) and to give each side a starter kit of forest, berries and gold near its base — so you'll never get a dead start or a base walled off from the fight.
Choosing a difficulty level
After you pick your map, you select how tough the AI opponent should be. Use Up/Down to move the marker and press A to choose:
| Difficulty | What to expect |
|---|---|
| Training | Sandbox mode — the AI gathers, builds, and even ages up, but never trains military or attacks. Practice economy, building, and unit controls without pressure. |
| Easy | A gentle opponent — it starts with standard resources, opens passively (no early rush), and makes only small, late attacks. Good for learning the basics. |
| Normal | The balanced experience — the AI gathers all resources, grows its economy, counters your army, and escalates its attacks over time. |
| Hard | A serious challenge — it thinks faster, sends bigger and earlier waves, and starts with extra resources (more Food, Wood and Gold). You'll need sharp economy and smart army composition to win. |
The AI also varies its strategy from match to match: it might Rush (early Barracks and Spearman pressure), Boom (economy-first, then overwhelm with a big late army), or Fast-Castle (bank Gold to age up quickly and field Archers and Cavalry). Harder difficulties favor the more aggressive openings; Easy never rushes. This keeps every match feeling different even at the same difficulty.
Sound
The game has sound effects (no music yet). Each key action plays its own short, recognizable blip:
- Select a unit/building, and order a move/gather/attack
- Combat hits, a building placed, a unit finishing training, and a villager depositing a resource load
- A triumphant rising chime on victory and a low falling one on defeat
The effects you hear are for your own empire — the AI's distant economy across the map stays quiet so the audio reflects what you are doing.
Sound On/Off: on the title screen, press Select to toggle sound. The line at the bottom reads SOUND ON / SOUND OFF; the setting sticks for the matches that follow.
Title screen & end-of-match stats
The title screen is a full illustrated scene: the EMPIRE BOY banner over a castle on a hill (its keep flies a fluttering flag), with a champion from each civilization (Picts, Lombards, Alans) standing along the foreground — under the subtitle THE AGE OF WAR and PRESS START. Press Start to begin (you'll pick your civ, then your map, on the next screens).
When a match ends, the VICTORY or DEFEAT screen reports how it went:
- Time — how long the match lasted
- Trained / Lost / Killed — units you trained, units you lost, enemy units you destroyed
- Built / Razed — buildings you put up, and enemy buildings you tore down
- Gathered — total resources your villagers brought home
Press Start to return to the title and play again.
Build orders & strategy
Know your opponent
The AI plays a genuine macro game with variable difficulty and strategy. Its behavior depends on the difficulty level you choose (Training/Easy/Normal/Hard) and the strategy it rolls for that match (Rush/Boom/Fast-Castle):
Base AI behavior (Normal):
- It opens with a House, then a Barracks, and its first attack — a group of three Spearmen — marches on your Town Centre at roughly 1m40s in. That's your defensive deadline.
- It grows its economy: it trains extra villagers (up to ~5) and gathers all three resources, Gold included. You can still out-expand it (it's bounded, and the map is big), but you have to actually play your economy.
- It counters your army. The AI watches what you field and builds the unit that beats it — mass Cavalry and it makes Spearmen; mass Archers and it makes Cavalry; mass Spearmen and it switches to Archers. Spamming one unit type won't work; mix your army.
- It advances to the Castle age when its economy can carry it, then fields Archers and Cavalry of its own and gains the +1 attack bump. If you sit in Feudal too long it will out-tier you — plan your own age-up.
- Its attacks escalate — each wave is bigger than the last, and it keeps adding Houses, so a passive player will be ground down. Don't dawdle: stay ahead on economy and keep your defence current.
Difficulty differences:
- Training: The AI does everything above except train military or attack — perfect for practicing economy and controls.
- Easy: Same economy but slower tempo and no early rush — the first wave comes later and smaller, giving you breathing room.
- Hard: Faster thinking, bigger waves, and extra starting resources — you'll need sharp play to keep up.
Strategy variety: The AI also rolls a random opening strategy each match:
- Rush: Early Barracks, fast Spearman pressure to disrupt your economy.
- Boom: Economy-first, building up villagers and resources before hitting you with a large late-game army.
- Fast-Castle: Banks Gold to age up quickly, then fields Archers and Cavalry to counter your Feudal forces.
Your edge is uncontested expansion (you can push out and grab map resources faster than it will) and reading its counters. Parking three villagers and waiting will not carry a match.
A solid opening build order
- Villagers to work immediately. Select each of your 3 starting villagers and send them to gather — a good split is 2 on Berries (Food) and 1 on Forest (Wood). Food is your most flexible resource (villagers, Spearmen, Cavalry, population), so lean on it early.
- House first (30 Wood) as soon as you have the Wood, to lift your population cap from 4 to 7. Don't let training stall at the cap.
- Pump 2–3 more Villagers from the Town Centre (50 Food each). The AI grows its own economy too, so this is about out-expanding it — get more workers onto the map's resources than it does. Build a second House to make room. Remember a building is raised by a villager and takes time, so start it early rather than at the moment you need it.
- Bank Wood for a military building. The cheapest is the Barracks (160 Wood) → Spearmen. You start with 150 Wood, so you need only a little gathering before you can place one.
- Defend the first wave. Keep 2–3 Spearmen home and meet the AI's trio at your base — your Town Centre is tough, and braced defenders beat an attacker who arrives piecemeal. When you need to respond fast, Pause (Select) to read the battle, and use select-all-military (Start, then A) to send your whole garrison onto the attackers in one go.
- Age up and upgrade. Once your economy is humming, drop a Blacksmith and start attack/armor research, and research the Castle age at your Town Centre to unlock Archers + Cavalry and the +1 attack bump. A Castle-age, Blacksmith-upgraded army beats an equal number of raw Feudal units — and the AI will age up too, so don't skip it.
- Then push out. Once your economy is ahead, mass a mixed army and march it across the map to raze the enemy Town Centre. The AI's base is its weak point — focus the Town Centre and ignore distractions.
Using the counter triangle
Spearman → Cavalry → Archer → Spearman. Once you reach the Castle age and can field the Gold-gated Archers and Cavalry:
- Spearmen are your bread-and-butter melee and shred Cavalry (+5 bonus).
- Archers out-range Spearmen — keep them behind your line and they'll whittle enemy infantry from 4 tiles away, but protect them: anything that reaches them kills them fast.
- Cavalry are fast raiders that run down Archers (+4 bonus) and harass villagers, but they lose head-on to braced Spearmen.
Mix your army to answer what the enemy fields rather than spamming one unit.
Picking a civilization
Each civ rewards a different plan — match your build order to your pick:
- Picts — turtle & economy. +20% Wood and +25% building HP. Lean on the tough buildings to absorb the AI's pushes while you out-economy it; great if you like to defend, boom, then roll out a big late army.
- Lombards — infantry pressure. Cheaper Barracks, tougher and faster Spearmen, and you start with a free Spearman. Get the Barracks up quickly and apply Spearman pressure earlier than anyone else.
- Alans — mobility & tempo. Faster villagers and +15% Food make for a snappy economy; their Cavalry are elite. Use the gather speed to power an early villager boom — but mind your fragile buildings (−15% HP), so don't get caught undefended.
Remember the AI is assigned the counter to your pick (Picts → Alans → Lombards → Picts), so each match plays a little differently.
Good luck, commander.